Imagine a world where your favorite fruits, garden-fresh vegetables, and even homemade jerky stay delicious and nutritious for months, sometimes even years. This isn’t a dream; it’s the reality a food dehydrator brings to your kitchen. Among the many options out there, the Harvest Maid Food Dehydrator stands out as a true workhorse, renowned for its reliability and efficiency in transforming perishable foods into long-lasting, healthy snacks. If you’re looking to embrace a more sustainable lifestyle, reduce food waste, or simply enjoy wholesome treats without additives, understanding the Harvest Maid’s capabilities is your first step.
What is a Food Dehydrator and Why Use One?
At its core, a food dehydrator is a kitchen appliance designed to remove moisture from food through a process of controlled heating and airflow. By reducing the water content, it inhibits the growth of bacteria, yeasts, and molds, which are the primary culprits behind food spoilage. This simple yet effective method of food preservation has been used for centuries, but modern dehydrators make it incredibly easy and consistent.
Why should you consider adding a Harvest Maid food dehydrator to your home? The benefits are abundant. Firstly, it significantly extends the shelf life of your food, allowing you to enjoy seasonal produce year-round and minimize waste. Think about those abundant summer harvests that would otherwise go bad – now they can become apple chips, sun-dried tomatoes, or hearty soup mixes. Secondly, dehydrating food is a fantastic way to create healthier snacks. You control the ingredients, avoiding the added sugars, salts, and preservatives often found in store-bought dried goods. It concentrates nutrients, offering a portable and energy-dense snack perfect for hiking, lunchboxes, or a quick pick-me-up. Finally, it’s a cost-effective solution, enabling you to buy produce in bulk when it’s in season and at its cheapest, saving you money in the long run.
Meet the Harvest Maid Food Dehydrator: A Legacy of Reliability
The Harvest Maid food dehydrator, often recognized for its sturdy build and consistent performance, holds a special place in the world of home food preservation. While the brand name “Harvest Maid” might evoke a sense of tradition, it’s frequently associated with Nesco American Harvest, a well-known name in dehydrators. Many loyal users speak of their Harvest Maid units lasting for decades, a testament to their durable design and robust construction. It’s not uncommon to find these machines still humming along faithfully after 15 or 20 years, a true “buy it for life” appliance.
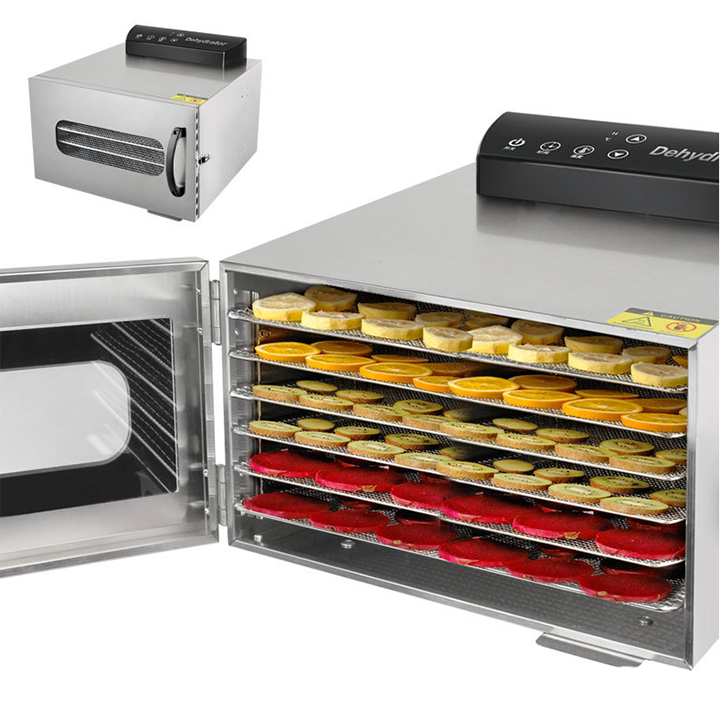
What makes a Harvest Maid food dehydrator such a steadfast companion in the kitchen? These dehydrators are typically known for their efficient, often bottom-mounted fan system that circulates warm air evenly throughout the trays. This design ensures thorough drying, though some models might benefit from occasional tray rotation to achieve perfectly uniform results. They usually feature adjustable temperature controls, allowing you to tailor the drying process to different types of food, from delicate herbs to dense meats. Many Harvest Maid models, such as the popular FD-5000, FD-1000, and FD-200, come with multiple stackable trays, often starting with around 5 to 9 trays and offering expandability to accommodate larger batches. This versatility makes them suitable for both everyday snacking and handling the bounty of a substantial garden harvest. The solid-state design and straightforward operation mean less fuss and more focus on the delicious results.
Choosing Your Harvest Maid: Models and What to Look For
When considering a Harvest Maid food dehydrator, or its close relative the Nesco American Harvest, you’ll find models that vary slightly in features and capacity. Understanding these differences can help you select the perfect unit for your home.
What to consider when choosing:
- Number of Trays and Expandability: Most Harvest Maid dehydrators come with a standard set of trays (e.g., 5, 8, or 9). If you plan on processing large quantities of food, look for models that allow you to purchase additional trays and stack them higher. This expandability is a key feature of many Nesco/Harvest Maid units, allowing you to customize capacity.
- Wattage and Temperature Range: Higher wattage generally means faster heating and more consistent temperatures. A good Harvest Maid food dehydrator will offer an adjustable thermostat, typically ranging from 95°F to 160°F (35°C to 71°C). This range is crucial for safely dehydrating everything from delicate herbs at lower temperatures to meats for jerky at higher, food-safe temperatures.
- Fan Placement: Many Harvest Maid and Nesco models feature a bottom-mounted fan. While efficient, some users find that bottom-mounted units may require rotating trays occasionally to ensure uniform drying, as the bottom trays might dry faster or slower depending on the food and settings.
- Overall Size and Footprint: Consider your available counter space and storage. While some models are compact, others can become quite tall when fully expanded with additional trays.
The enduring popularity of these dehydrators often boils down to their excellent value, durability, and a track record of reliable performance that has satisfied home preservers for generations.
Getting Started: Basic Usage of Your Harvest Maid Food Dehydrator
Using a Harvest Maid food dehydrator is quite intuitive, making it a great choice for beginners and experienced dehydrators alike. Here’s a basic guide to get you started on your dehydrating journey:
- Clean Your Dehydrator: Before its first use and after each use, ensure all trays and the base are clean. Most trays can be washed in warm soapy water or placed on the top rack of your dishwasher.
- Prepare Your Food: This is perhaps the most crucial step. Wash all produce thoroughly. For fruits and vegetables, slice them uniformly to ensure even drying. Aim for slices roughly 1/8 to 1/4 inch thick. Thicker pieces will take longer to dry, and uneven pieces will result in some being over-dried while others are still moist. For fruits like apples or bananas, a brief pretreatment with lemon juice or a commercial anti-darkening agent can prevent browning. Meats for jerky should be sliced thinly against the grain.
- Load the Trays: Arrange your prepared food in a single layer on the dehydrator trays. It’s essential not to overlap the food, as good airflow between pieces is vital for efficient drying. Overcrowding can significantly extend drying times and lead to uneven results.
- Set Temperature and Time: Consult your Harvest Maid’s manual or a general dehydrating guide for recommended temperatures for different foods. For instance, fruits often dry best at 135°F (57°C), vegetables at 125°F (52°C), and jerky at 160°F (71°C). Start with the recommended drying time, but be prepared to adjust as needed. Factors like humidity, food thickness, and moisture content will influence the actual drying duration.
- Monitor and Rotate (if needed): Regularly check your food’s progress. With bottom-mounted fan models, rotating the trays from bottom to top, or rotating individual trays 180 degrees, every few hours can help ensure more consistent drying across all layers.
- Know When It’s Done: This comes with practice.
- Fruits: Should be pliable, leathery, and have no sticky spots when cool. They shouldn’t have any visible moisture when squeezed.
- Vegetables: Should be brittle, crunchy, or tough. They should snap when bent.
- Jerky: Should be leathery and chewy, but not brittle, with no moist spots. It shouldn’t break easily.
Once your food reaches the desired dryness, turn off the Harvest Maid food dehydrator and allow the food to cool completely before storing.
What Can You Dehydrate? Delicious Foods and Recipe Ideas
The versatility of the Harvest Maid food dehydrator means a world of delicious possibilities opens up in your kitchen. From sweet treats to savory snacks, you can transform a wide array of ingredients into shelf-stable delights.
Fruits are a perennial favorite:
- Apple Chips: Slice thinly, optional sprinkle of cinnamon. Dry at 135°F (57°C) until crispy.
- Banana Chips: Slice, a quick dip in lemon juice prevents browning. Dry at 135°F (57°C).
- Berry Blends: Strawberries, blueberries, raspberries – dry until leathery. Great for trail mix or rehydrating in oatmeal.
- Mango & Pineapple Chews: Slice into strips. These become intensely flavored, chewy snacks.
- Fruit Leathers: Puree your favorite fruit (with optional sweeteners), spread thinly on a fruit leather sheet (often included with Harvest Maid units), and dry at 135°F (57°C) until pliable.
Don’t forget the amazing vegetables:
- Kale Chips: Tear into pieces, massage with a little oil and salt/seasoning. Dry at 125°F (52°C) until crispy.
- Sweet Potato Crisps: Thinly slice, no need to peel. Deliciously healthy.
- Sun-Dried Tomatoes: Slice ripe tomatoes, dry until leathery. Store in olive oil for an extra treat.
- Mushroom Slices: Dry various mushrooms for adding umami to soups and stews.
- Herbs: Delicate herbs like basil, oregano, and thyme dry quickly at low temperatures (around 95°F / 35°C), preserving their flavor.
For the meat lovers, jerky is a must:
- Beef Jerky: Marinate thin strips of lean beef in your favorite spices and sauces. Dry at 160°F (71°C) until tough and pliable.
- Turkey Jerky: A leaner alternative, equally delicious when properly marinated and dried.
With your Harvest Maid food dehydrator, you can also make healthy dog treats, homemade spice blends, and even craft items like dried flowers. The possibilities are truly endless!
Pro Tips for Effective Dehydration with Your Harvest Maid
Becoming a dehydration pro with your Harvest Maid food dehydrator is all about a few clever tricks and consistent practices. These tips will help you maximize efficiency and achieve the best possible results every time.
“Consistency is the secret sauce to successful dehydration,” advises Sarah Jenkins, a seasoned food preservationist with two decades of experience. “Uniform slicing isn’t just a suggestion; it’s fundamental. If your pieces are uneven, some will be perfectly dried while others are still damp, leading to potential spoilage or wasted effort.”
- Uniform Slicing is Key: As Sarah highlighted, consistent thickness ensures that all your food dries at the same rate. Invest in a good mandoline slicer for fruits and vegetables or a sharp knife and a steady hand for jerky.
- Pretreatment for Fruits: For fruits prone to browning, like apples, pears, and bananas, a quick dip in a lemon juice and water solution (1 cup water to 1 tablespoon lemon juice) for about 5 minutes can work wonders. Ascorbic acid (Vitamin C) powder is another effective option.
- Optimal Temperature Ranges: While your Harvest Maid food dehydrator offers adjustable temperatures, adhering to general guidelines is crucial. Keep herbs and delicate items at lower temperatures (95-105°F) to preserve volatile oils and colors. Fruits and vegetables typically do well at 125-135°F. Meats for jerky require a higher temperature, around 160°F, for food safety.
- Ensure Good Airflow: Never overcrowd your trays. Leave a little space between each piece of food. This allows the warm, dry air from your Harvest Maid food dehydrator to circulate freely around every surface, leading to quicker and more even drying.
- Rotate Trays (Especially for Bottom-Mounted Units): If your Harvest Maid has a bottom-mounted fan, it’s a good habit to rotate the trays every few hours. Move the bottom trays to the top and rotate each tray 180 degrees. This helps compensate for any slight temperature variations and ensures all food dries uniformly.
- Don’t Rush It: Dehydration is a slow process, and patience is a virtue here. Resist the urge to crank up the temperature too high, as this can “case harden” the food, creating a dry exterior that traps moisture inside, leading to spoilage.
- Cleanliness is Paramount: Always start with clean equipment and fresh, high-quality produce. After drying, clean your trays promptly to prevent food residue from hardening.
By following these simple yet effective tips, your Harvest Maid food dehydrator will consistently deliver perfectly dried, delicious, and safe food.
Proper Storage for Your Dehydrated Delights
Once your food has been perfectly dried in your Harvest Maid food dehydrator, proper storage is the final, critical step to ensure its longevity and maintain its quality. Improper storage can quickly undo all your hard work.
- Cool Down Completely: After drying, allow the food to cool down to room temperature for several hours before packaging. Storing warm food can cause condensation, leading to moisture buildup and potential spoilage.
- Conditioning (for fruits and vegetables): This extra step helps equalize any residual moisture content across all pieces, reducing the risk of mold. Place the cooled dried food loosely in airtight containers (like glass jars or plastic containers) for 7-10 days. Shake the containers daily. If you see any condensation, return the food to the Harvest Maid food dehydrator for further drying. If mold appears (which is rare with proper drying), discard the affected food.
- Airtight Containers are Essential: Oxygen is the enemy of dehydrated food. Once conditioned, store your food in truly airtight containers. Mason jars with new lids, vacuum-sealed bags, or Mylar bags are excellent choices.
- Dark, Cool, and Dry Place: Light can degrade nutrients and color over time. Store your sealed containers in a pantry, cupboard, or basement that is cool, dark, and dry. Avoid areas with temperature fluctuations.
- Labeling: Always label your containers with the contents and the date of dehydration. This helps you track shelf life and ensures you use older batches first.
With proper drying in your Harvest Maid food dehydrator and careful storage, most dehydrated fruits and vegetables can last for 1 to 5 years, while jerky typically lasts for several months up to a year.
The Nutritional Value of Dehydrated Foods
One of the great advantages of using a Harvest Maid food dehydrator is the ability to preserve food while largely retaining its nutritional value. While no preservation method leaves food exactly as it was fresh, dehydration is remarkably effective.
When you remove water from food using a Harvest Maid food dehydrator, you concentrate its natural sugars, fibers, vitamins, and minerals. This means that a handful of dried apricots, for example, will offer a more concentrated burst of nutrients than the same volume of fresh apricots. Dietary fiber, essential for digestive health, remains largely intact. Many vitamins, particularly fat-soluble ones like A and E, are well-preserved. While some heat-sensitive vitamins, like Vitamin C, can be partially reduced during the drying process, the overall nutritional profile remains robust. Dehydrated foods from your Harvest Maid food dehydrator make for incredibly healthy snacks, free from the excessive salts, sugars, and artificial additives often found in commercial alternatives. They provide sustained energy, making them perfect for active lifestyles or simply as wholesome treats for the whole family.
Dehydration vs. Other Preservation Methods
When it comes to extending the life of your food, you have several options beyond the Harvest Maid food dehydrator. Each method has its unique advantages and disadvantages, making dehydration a distinct and valuable tool in your food preservation arsenal.
- Canning: This method involves sealing food in jars and heating them to destroy microorganisms. It’s excellent for preserving fruits, vegetables, and meats in liquid, like jams, pickles, and stews. However, canned goods can be bulky, and the high heat can sometimes alter texture and nutritional content more significantly than dehydration.
- Freezing: Freezing halts microbial growth by lowering temperatures, maintaining much of the food’s fresh taste and texture. It’s versatile for nearly all types of food. The main drawbacks are the need for freezer space and potential issues with freezer burn if not packaged correctly.
- Freeze-Drying: This advanced method involves freezing food and then reducing the surrounding pressure to allow the ice to sublimate directly into vapor. Freeze-drying retains almost all nutrients, flavor, and original texture, and produces extremely lightweight, long-lasting food. However, freeze-dryers are significantly more expensive and energy-intensive than a Harvest Maid food dehydrator.
Why choose your Harvest Maid food dehydrator?
Dehydration offers several unique benefits. It’s incredibly space-saving, as dried foods shrink considerably. It’s energy-efficient compared to continuous freezing or high-heat canning. Dehydrated foods from your Harvest Maid food dehydrator are also lightweight and portable, making them ideal for camping, hiking, or emergency preparedness kits. Furthermore, dehydration creates unique textures and flavors – think crispy apple chips, chewy fruit leathers, or savory jerky – that other methods can’t replicate. It provides a distinct way to enjoy your food that complements other preservation techniques beautifully.
Frequently Asked Questions (FAQ) About Your Harvest Maid Food Dehydrator
Q: How long does it take to dehydrate food in a Harvest Maid food dehydrator?
A: Drying times vary significantly depending on the food type, thickness, moisture content, and environmental humidity, but generally range from 4 to 12 hours for fruits and vegetables, and 6 to 15 hours for jerky.
Q: Can I dehydrate different types of food at the same time in my Harvest Maid?
A: It’s generally recommended to dehydrate similar foods together, especially those requiring the same temperature and drying time, and those with compatible aromas (e.g., don’t dry onions with apples).
Q: How do I clean my Harvest Maid food dehydrator?
A: Most trays can be washed in warm, soapy water or on the top rack of a dishwasher. The base unit should be wiped clean with a damp cloth; never immerse the base in water.
Q: What is “case hardening” and how can I avoid it with my Harvest Maid?
A: Case hardening occurs when the outside of the food dries too quickly at high temperatures, forming a hard shell that traps moisture inside. To avoid this, use the recommended lower temperatures for most foods and ensure good airflow by not overcrowding trays.
Q: Where can I find replacement parts or additional trays for my Harvest Maid food dehydrator?
A: Since Harvest Maid is closely associated with Nesco, Nesco parts and trays are often compatible. Check online retailers, appliance parts stores, or Nesco’s official website for availability.
Embrace the Art of Preservation
The Harvest Maid food dehydrator isn’t just an appliance; it’s a gateway to a world of healthier eating, reduced waste, and culinary creativity. With its reputation for durability and efficient performance, it empowers you to take control of your food, preserving the bounty of nature and creating wholesome snacks free from artificial additives. Whether you’re a seasoned homesteader or just beginning your journey into food preservation, the reliable Harvest Maid food dehydrator offers a straightforward and rewarding experience. So, fire up your dehydrator, experiment with new recipes, and discover the satisfying joy of making your own dried delights. Start dehydrating with Harvest Maid today and taste the difference!