Ever dreamt of biting into a perfectly chewy, naturally sweet apple chip, or a savory piece of homemade jerky, all crafted right in your own kitchen? If you’re nodding along, but your kitchen space feels more “cozy” than “cavernous,” then let me introduce you to your new culinary secret weapon: the Mini Food Dehydrator. This compact powerhouse is transforming how we think about food preservation, making it accessible even for the smallest of homes and the busiest of lives. It’s not just a gadget; it’s a gateway to a world of healthier, tastier, and more sustainable eating habits.
What exactly is a mini food dehydrator? At its heart, it’s a clever appliance designed to gently remove moisture from food, extending its shelf life and concentrating its natural flavors and nutrients. Using controlled heat and consistent airflow, it dries out fruits, vegetables, herbs, and even meats, turning perishable goods into shelf-stable, delicious snacks and ingredients. Think of it as giving your food a long, slow sunbath, without the fuss or unpredictability of actual sunshine. The “mini” aspect means it’s specifically engineered to fit seamlessly into any living space, offering all the benefits of food dehydration without taking over your countertop.
The perks of owning a mini food dehydrator are manifold. First and foremost, it empowers you to create incredibly healthy snacks, free from added sugars, preservatives, or artificial ingredients often found in store-bought options. Imagine customizing your fruit leathers, knowing exactly what goes into them. Beyond health, it’s a fantastic tool for reducing food waste. Got a bumper crop of garden tomatoes or a few extra apples nearing their prime? Dehydrate them! You’ll save money and contribute to a more sustainable kitchen. Plus, the concentrated flavors of dehydrated foods are simply unparalleled, adding a gourmet touch to your meals and snacks.
Choosing Your Perfect Mini Food Dehydrator
So, you’re ready to dive into the world of delicious dehydrated delights. How do you pick the right mini food dehydrator for you? It’s all about matching the appliance to your lifestyle and needs.
Size and Capacity for Your Lifestyle
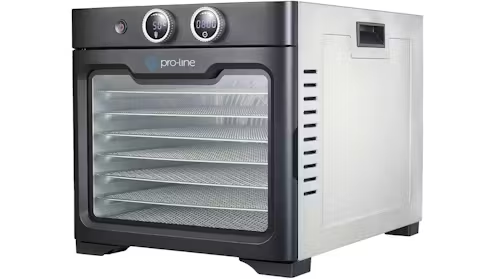
When we talk about “mini,” we’re talking about models designed for individuals, couples, or small families, or for those with limited kitchen real estate. These units typically feature fewer trays (often 4-6) and a smaller footprint than their commercial counterparts. Consider how much food you realistically plan to dehydrate at once. If you’re mostly making personal batches of fruit chips or a small amount of jerky for hiking, a very compact model will be ideal. If you occasionally want to preserve a small garden harvest, a slightly larger mini unit might serve you better.
Temperature Control: A Key Feature
One of the most crucial features is adjustable temperature control. Different foods require specific temperatures for optimal drying. For instance, fruits generally dry best at higher temperatures (around 135°F / 57°C) to prevent spoilage and encourage enzymatic activity, while herbs and vegetables need lower settings (around 95-125°F / 35-52°C) to retain their delicate flavors and nutrients. Jerky requires higher temperatures (around 145-160°F / 63-71°C) to ensure food safety. Look for a model that offers a wide temperature range and precise control.
Airflow System and Materials
Most mini dehydrators use a vertical airflow system, where a heating element and fan are located at the bottom or top, circulating air up or down through stackable trays. While horizontal airflow (where the fan is at the back, like an oven) is often preferred for even drying without tray rotation, it’s typically found in larger, more expensive units. For mini dehydrators, a good vertical airflow system with a powerful fan can still deliver excellent results, especially if you occasionally rotate trays. Also, check the materials: BPA-free plastic trays are common, and stainless steel options are available for durability and easy cleaning, though they might increase the price.
“Don’t let a small kitchen deter you from experiencing the joys of food dehydration,” advises Clara Jenkins, a renowned home economics expert. “Mini food dehydrators are engineered to maximize efficiency in compact spaces, making healthy food preservation a reality for everyone.”
Getting Started: Basic Usage Guide for Your Mini Food Dehydrator
Using a mini food dehydrator is straightforward, even for beginners. Here’s a simple step-by-step guide to get you going:
Prepare Your Produce
Start with fresh, ripe, high-quality ingredients. Wash them thoroughly. For fruits like apples or bananas, slice them uniformly – thin slices dry faster and more evenly. Vegetables may benefit from blanching (briefly boiling then plunging into ice water) to preserve color and nutrients. Some fruits, like apples, can be pre-treated with lemon juice to prevent browning.
Load the Trays
Arrange your prepared food in a single layer on the dehydrator trays. Avoid overcrowding, as proper airflow is essential for even drying. Leave a little space between each piece. If you’re drying different types of food, it’s generally best to dry similar items together, or at least foods with compatible drying times and temperatures.
Set Temperature and Time
Consult your dehydrator’s manual or a reliable dehydrating guide for recommended temperatures and times for your specific food. As mentioned, fruits usually need higher heat, while herbs require lower settings. Many recipes provide estimated drying times, but remember these are just guidelines; actual times can vary based on food thickness, moisture content, and ambient humidity.
Monitor and Rotate
Check your food periodically. If your mini food dehydrator has a vertical airflow system, you might want to rotate the trays every few hours – moving the bottom trays to the top and vice versa – to ensure everything dries evenly. Look for signs of doneness: leathery for fruits, brittle for vegetables, and firm for jerky.
Delicious Discoveries: Foods You Can Dehydrate in Your Mini Unit
The possibilities with a mini food dehydrator are vast and exciting.
- Fruits: Apple slices, banana chips, mango chunks, strawberry halves, peach slices, and even citrus peels for zest. Fruit leathers made from pureed fruit are also a huge hit.
- Vegetables: Kale chips, sun-dried tomatoes, mushroom slices, bell pepper strips, zucchini chips, and dried carrots for soups.
- Herbs: Preserve your garden’s bounty! Basil, oregano, thyme, rosemary, mint – all dry beautifully, retaining their potent flavors for months.
- Jerky: Create your own beef, turkey, or even salmon jerky. A mini food dehydrator is perfect for experimenting with small, manageable batches and different marinades.
- Yogurt and More: You can even make yogurt “bark” or “fruit roll-ups” from plain yogurt mixed with fruit puree, offering a healthy, probiotic-rich snack.
Pro Tips for Dehydrating Effectively
Maximizing the efficiency of your mini food dehydrator is easy with a few simple tricks.
- Uniform Slicing: Consistency is key. Use a mandoline or a sharp knife to ensure all pieces are roughly the same thickness. This guarantees even drying, preventing some pieces from becoming over-dried while others are still moist.
- Pre-Treatments: For fruits like apples and pears, a quick dip in a lemon juice-water solution (about 1 part lemon juice to 4 parts water) can help prevent browning and preserve their vibrant color.
- Avoid Flavor Mixing: Unless you intentionally want to combine flavors, avoid dehydrating foods with very strong aromas (like onions or garlic) alongside mild foods (like apples) in the same batch, as flavors can transfer.
- Good Airflow: Ensure there’s plenty of space between food pieces on the trays. Overloading your mini food dehydrator restricts airflow, leading to longer drying times and potentially uneven results.
- Patience is a Virtue: Dehydrating takes time. Don’t rush the process by cranking up the temperature too high, as this can cook the outside of the food while leaving the inside moist, creating a hard crust (case hardening). Slow and steady wins the race for perfectly dehydrated foods.
Storing Your Dehydrated Treasures
Proper storage is crucial for maintaining the quality and extending the shelf life of your dehydrated foods.
Once your food is fully dehydrated, let it cool completely to room temperature. This “conditioning” phase helps stabilize any remaining moisture. Then, transfer your dried goods to airtight containers or vacuum-sealable bags. Glass jars with tight-fitting lids, food-grade plastic containers, or Mylar bags are excellent choices. Store these containers in a cool, dark, dry place, such as a pantry or cupboard. Away from direct sunlight and heat, your dehydrated snacks can last for months, or even up to a year or more for some items, ready to be enjoyed whenever you crave a healthy, natural treat.
The Nutritional Boost of Dehydrated Foods
One of the most compelling reasons to use a mini food dehydrator is the incredible nutritional value of the resulting foods. Dehydration concentrates nutrients because it primarily removes water, leaving behind vitamins, minerals, and fiber in a more compact form. While some heat-sensitive vitamins (like Vitamin C) might be slightly reduced, the majority of essential nutrients are well-preserved. Dehydrated fruits and vegetables become excellent sources of dietary fiber, which aids digestion, and beneficial antioxidants. They are a far healthier alternative to many processed snacks, offering natural energy without added sugars or unhealthy fats.
Dehydrating vs. Other Preservation Methods
Compared to other common food preservation methods, using a mini food dehydrator offers unique advantages. Freezing, while excellent for retaining nutrients, requires significant freezer space and energy, and some foods can become mushy upon thawing. Canning involves high heat and acidity, which can alter flavors and sometimes reduce nutrient content, plus it requires special equipment and glass jars that take up space. Pickling offers a tangy flavor but isn’t for everyone.
Dehydrating, on the other hand, requires minimal storage space for the finished product, as moisture has been removed. It often retains a unique texture – chewy for fruits, crispy for vegetables – that other methods don’t achieve. For small batches, a mini food dehydrator is remarkably energy-efficient, often using less power than running a large oven or maintaining a chest freezer. It’s a method that truly allows the natural essence of the food to shine through, in a compact, convenient package.
Frequently Asked Questions About Mini Food Dehydrators
Q1: Is a mini food dehydrator worth the investment?
A mini food dehydrator is absolutely worth it if you’re looking for a cost-effective way to preserve food, reduce waste, and create healthy snacks without needing a lot of kitchen space. It pays for itself quickly through savings on store-bought dried goods.
Q2: What are the best foods for a mini dehydrator?
Fruits like apples, bananas, and berries, along with vegetables like tomatoes, kale, and mushrooms, are excellent choices. Herbs and small batches of beef or turkey jerky also work wonderfully in a mini food dehydrator.
Q3: How long does it take to dehydrate food in a mini unit?
Drying times vary greatly depending on the food type, thickness, and moisture content, but generally range from 4 hours for herbs to 12-24 hours for fruits and jerky. Always check your specific recipe and food’s texture for doneness.
Q4: Can I make jerky in a mini food dehydrator?
Yes, you can! A mini food dehydrator is perfect for making small, personalized batches of jerky. Just ensure your meat is sliced thinly and uniformly, marinated properly, and dried at a safe temperature (typically 145-160°F / 63-71°C).
Q5: How do I clean my mini food dehydrator?
Most trays and the base can be wiped down with a damp cloth and mild soap. Some trays are dishwasher safe; always check your manual. Ensure the heating element and fan area remain dry. Regular cleaning prevents odors and bacterial growth.
Q6: Do dehydrated foods lose their nutrients?
While some heat-sensitive nutrients like Vitamin C can be slightly reduced, the majority of vitamins, minerals, and fiber are well-preserved and concentrated when food is dehydrated. It remains a highly nutritious preservation method.
Q7: Are mini food dehydrators noisy?
Most mini food dehydrator models produce a gentle humming sound from their fan, similar to a quiet desk fan. It’s generally not disruptive, but noise levels can vary between brands and models.
Unleash Your Inner Food Artisan with a Mini Dehydrator
The mini food dehydrator isn’t just an appliance; it’s an invitation to a more flavorful, healthier, and sustainable way of life. It offers an easy, efficient solution for preserving nature’s bounty, transforming fresh ingredients into wholesome snacks and versatile pantry staples. Whether you’re a health enthusiast, a budget-conscious cook, or simply someone with a small kitchen and a big appetite for delicious, homemade treats, a mini food dehydrator can open up a world of culinary possibilities. So, why wait? Grab your mini food dehydrator, experiment with your favorite foods, and start savoring the incredible taste and convenience of home-dried goodness today!